I wanted to share what I’m doing, and maybe some of you will want to play along. I’m going to be doing a lot of starfield renders in this coming month, because… well, several reasons. First, once I have the initial flame* set up, it doesn’t take much to tweak it into revealing new constellations, adjusting color, and rendering can run while I’m busy with the Day Jobtm thus freeing me up to have my art and eat, too. Secondly, I needed a new library of art for book covers. Sure, I can buy space scenes on stock art. So can anyone else. I want to have some truly original and unique pieces. Besides which, making space art makes me happy. I had to laugh when a friend asked me, as I announced my project, if I’d be using brushes and elements to add the planets and what not, or if I was going full goddess mode and creating it all myself. Full goddess mode: activated.
There are, as I alluded to above, easier ways to do this and you can still get great results. I’ve never been one to make life easy on myself. I’ll be using three programs for this tutorial. Two are free, one is cheap if you grab it on sale. First, Apophysis 7X is a fractal flame (*see above) rendering engine. I use it for a lot of things, but it does a great starfield with lovely effects that you can make look realistic or fantastic. Second, Blender is a 3D rendering and sculpting engine (Blender is optional, as I’ll show later in the tutorial). I’m still learning how to use it, but for this you’ll literally be opening a file and saving it. Finally, Affinity Photo is a must-have. For $50, or half that if you catch a sale, you’ll have a powerful replacement for Adobe Photoshop that you own. I’m not using anything special for hardware for this, no pentablet or pen stylus, just a mouse and keyboard.
The first thing you will want to do is create your starfield. The easiest way for me to show this to you is to provide you with a .flame file, which you can find here, to download. You can find Apophysis 7X here, being aware this is freeware that no one, to the best of my knowledge, is still working on. There are other softwares that do similar effects, I haven’t worked with them.

If you want to go full creator mode, click on the Fx icon at the top toolbar. You will see a control panel for the triangles (this is the vector math that underlies the program, but no worries, you can tweak without any math!).
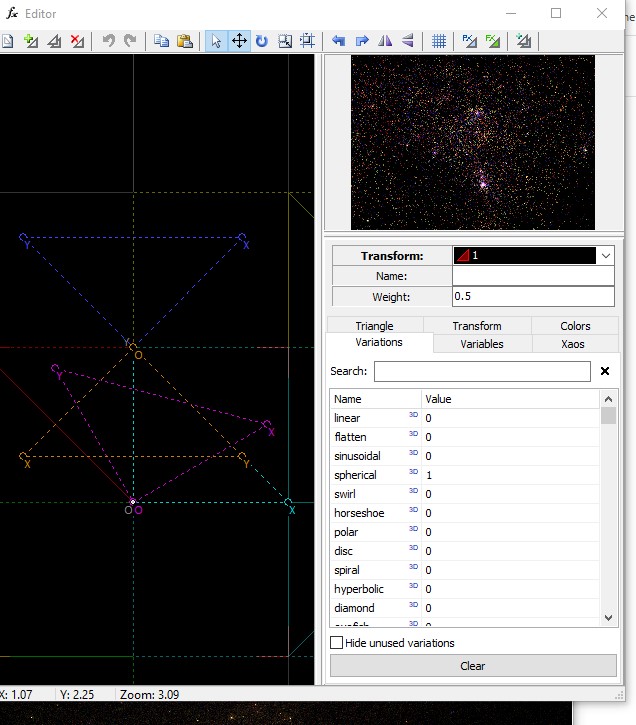

You’ll note I’m ignoring vast areas of this software. It can get beautifully complex, very fast, but that’s not why we are here today and it can take years to fully master (she says ruefully).

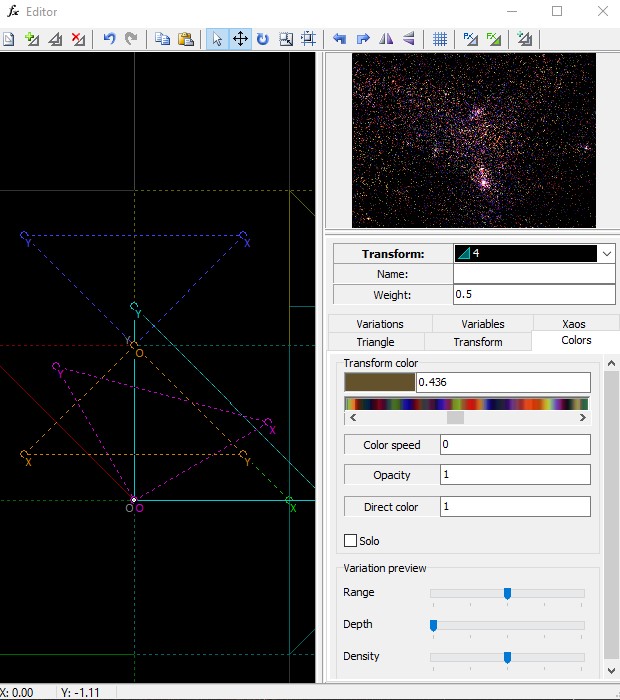
Back to the main screen, after closing Fx, you can select a new gradient by clicking the gradient icon on the top toolbar. if you click on that bottom middle dropdown, you’ll see a large selection of gradients. For starfields, I find that gradients with some black in them work very well – we don’t want light gas clouds, usually, we want dark space with scattered glowing stars. If you want gas clouds, well, slide that slider around until you see something cool, and let it go!
You can also adjust the scale. This is, effectively, the best way to zoom in this program. Small numbers, say 5, pull the camera way back, while a higher number like 50 plunges you right in close to what you want to highlight.
Finally, click the blue gear to render.

I have this set up to render. You’ll want to change your filename. You can change the size (and you can do that from the same editor where we chose a palette of colors as well). I have the memory limited, as I want to be able to do other things while this is rendering and not have to put the fans under my laptop. I also have the quality at a mid-range setting I wouldn’t use if I were going to be making prints or posters of this work. But those can take hours and hours to render. This should only take about a half hour on a reasonably fast computer.

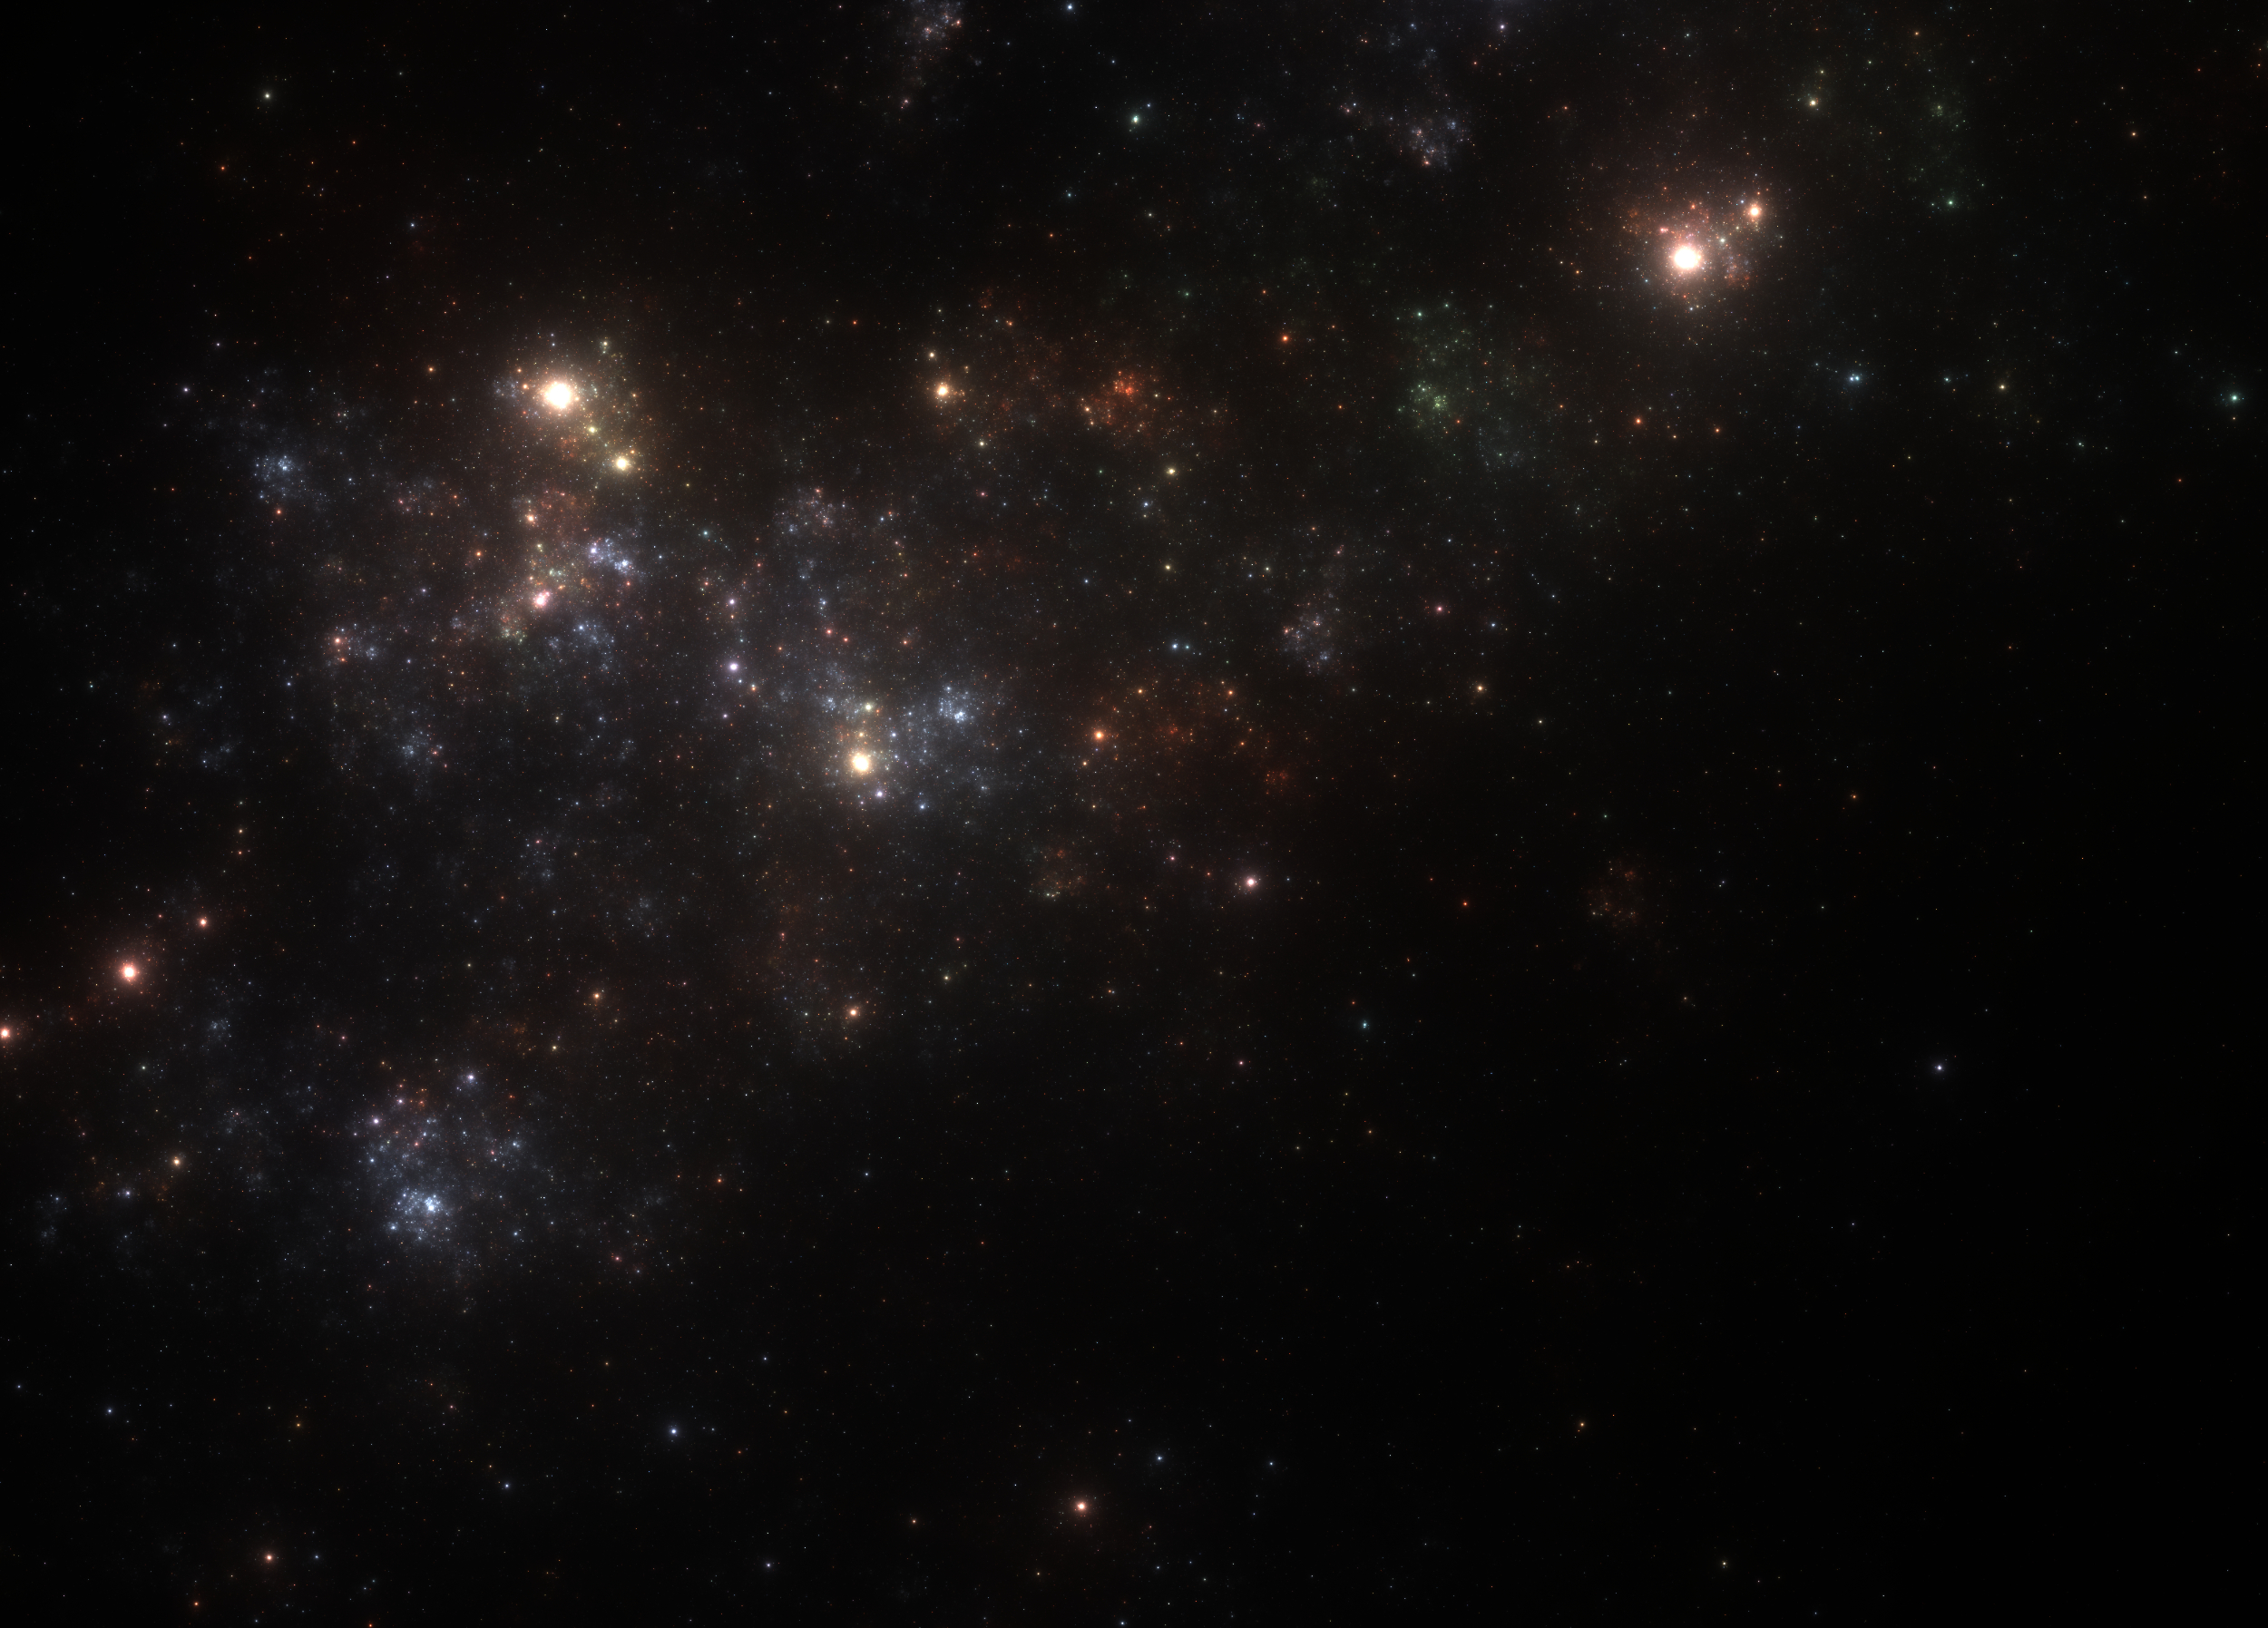
Now I have opened the .png file in Affinity Photo. Since this renders as the transparency, no background, you will add a background in post-processing with Affinity. Select the fill bucket icon from your toolbar, and make sure your foreground color is black. Create a new pixel layer, and click on it. It will flood with black, and you will have a beautiful starfield! I’ve exported it as a .jpg file and you can see how pretty it is just there, without adding anything. I could stop here. But I won’t.
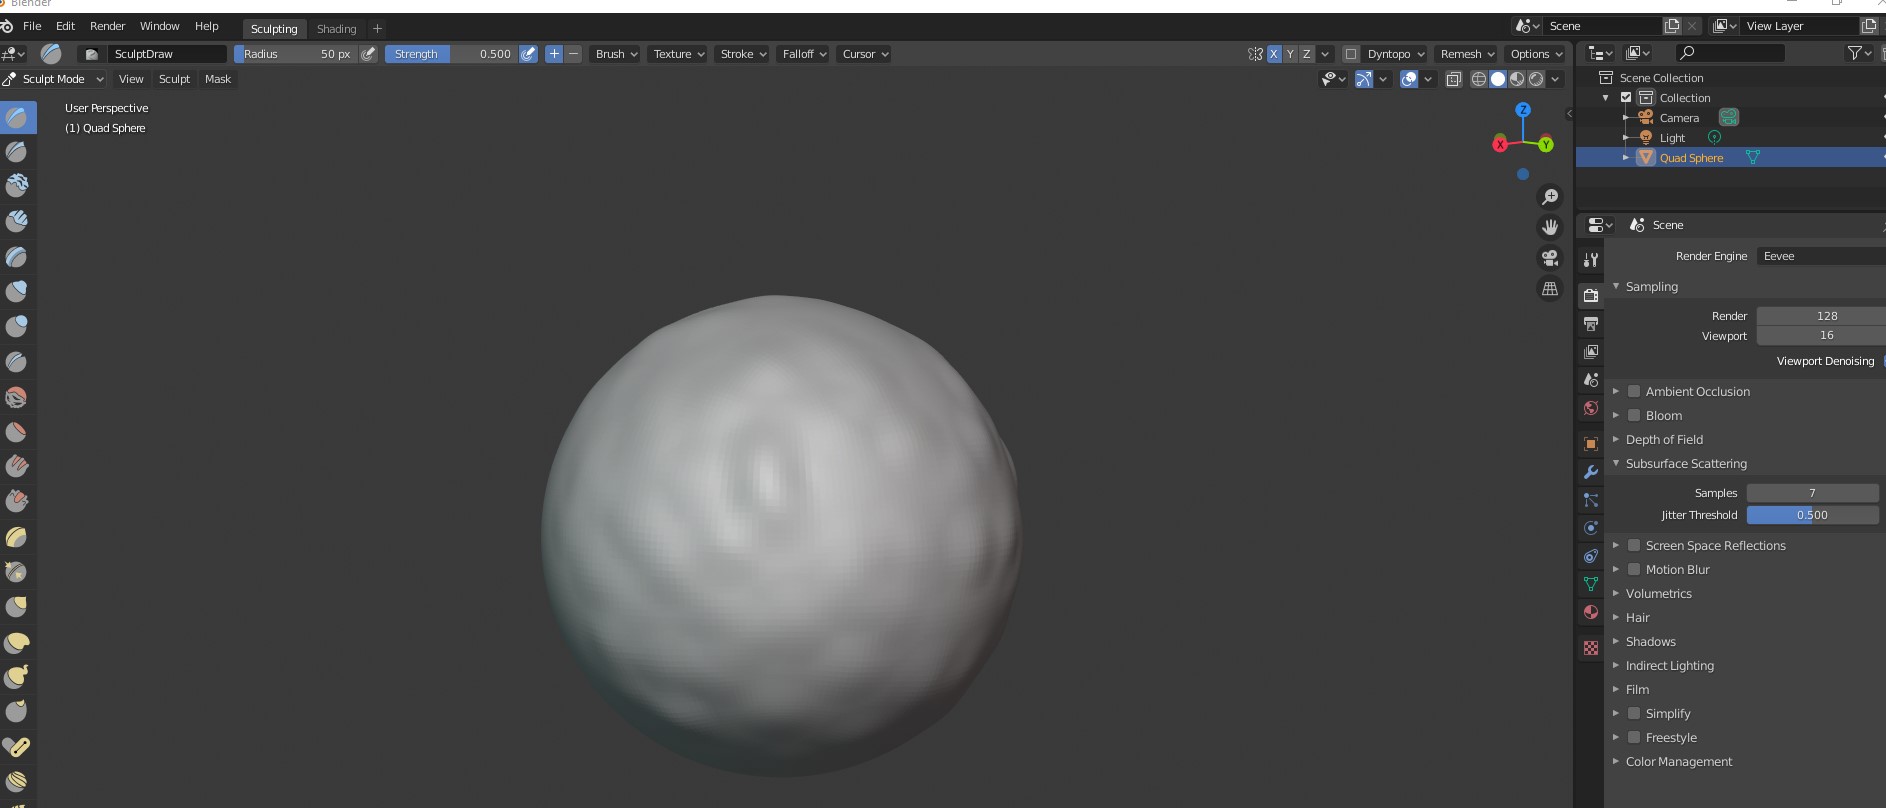
Open Blender, using ‘Sculpting’ mode. You will see a shaded sphere. You can immediately render that, or you can tap the sphere with the mouse to create some raised areas mimicking landmasses. Up to you!

Open your saved ‘planet’ render in Affinity Photo. It’s going to look very blah to start with!
You’ll want to find and use a texture background. This should be fairly high resolution, as you will be distorting it. I grabbed one from Pixabay, you’ll want something fairly organic and random (rust, moss, dirt…) unless you want your planet to look like an enormous alien installation. Which is fun too.
Open your texture in Affinity Photo. From the toolbar select Filters>Distort>Spherical and you’ll have a little editor box pop open. Set the intensity to 100%, and you’ll have to manually type the size into the other slider, it does not go big enough on it’s own. I play with this until I have a sphere that is most of the size of the image (1500 px in this case) and then click apply.

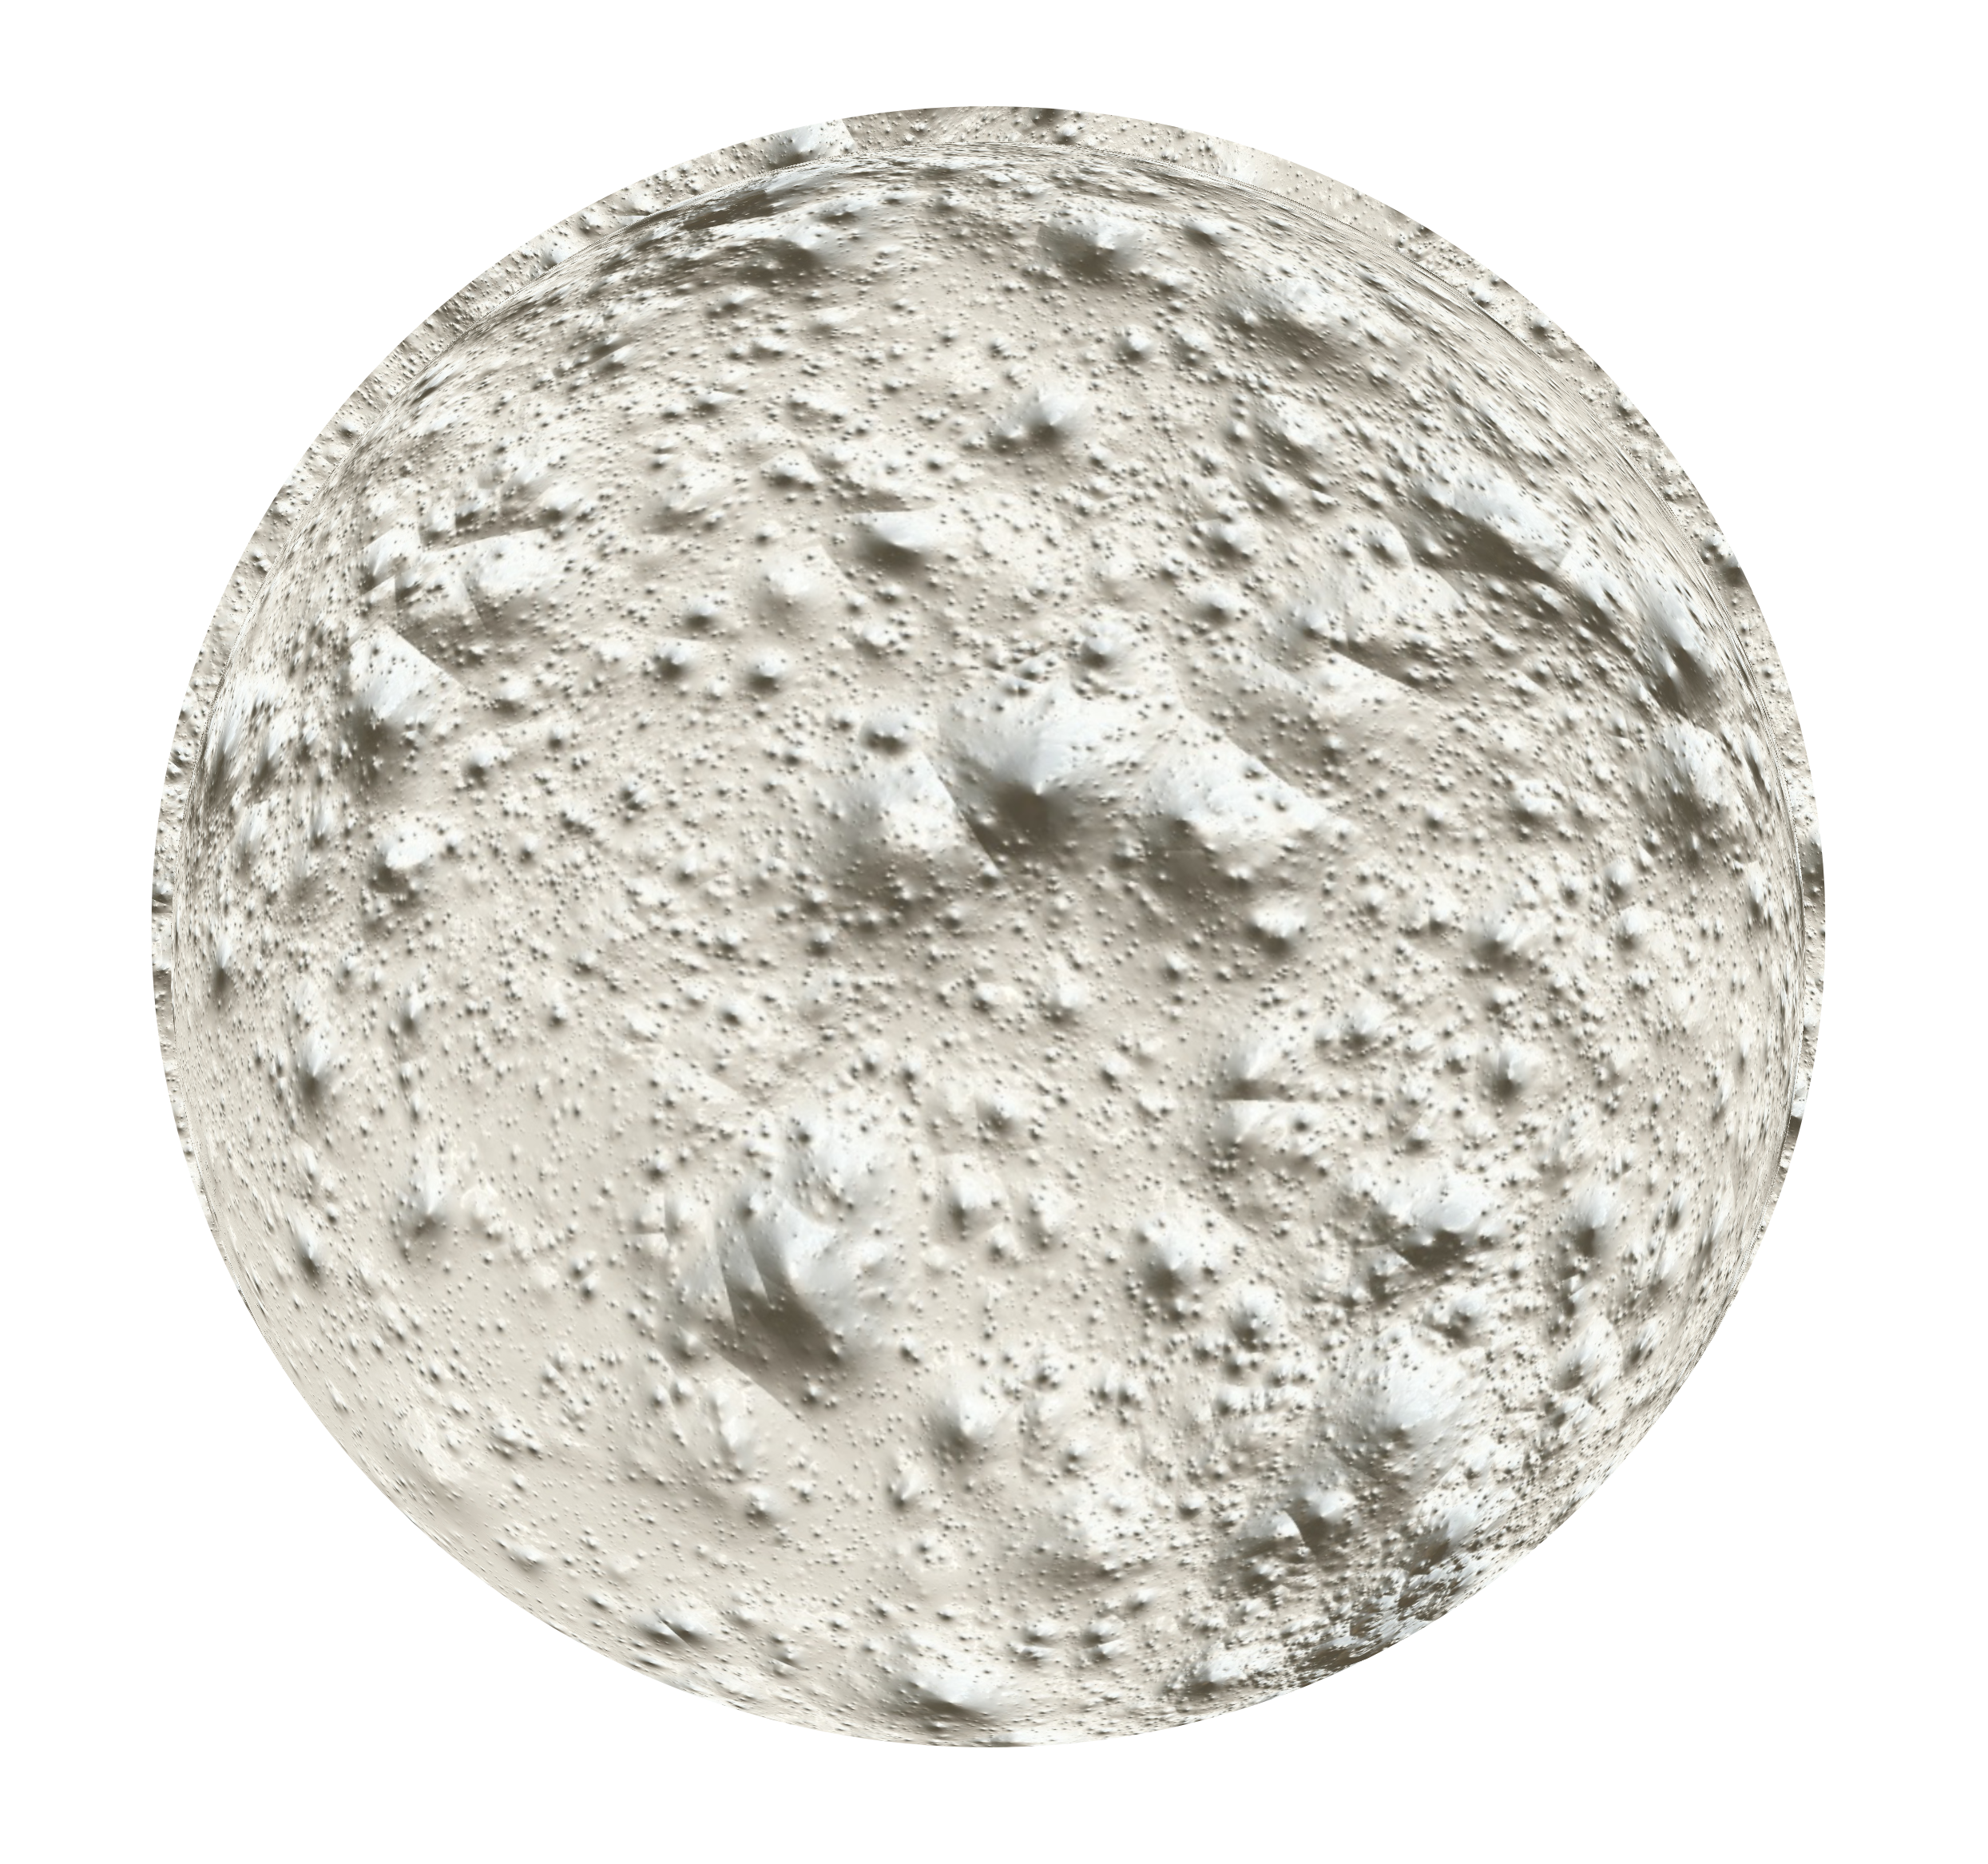
Now, go back up to that Filter, click, and you’ll see ‘repeat sphere’ as the top option. Click it, and you’ll see a cool sphere on the image. Finally, go grab the ellipse tool from the sidebar, and create a white disk over your sphere, making sure that it’s the same size. In the layers area, right click your disk layer, and select ‘mask to below’ and you’ll get this…
Now! We can start creating our scene, as we have the elements we need. Using the place option from the file menu, place the starfield with the black background (I usually save these from where I paired them up, as .jpg for web design, or .png for lossless when doing large files for print) on top of your blender planet. Now, adjust this layer using the dropdown next to opacity – overlay will work nicely, but mess around and see what you like. You’ll note you’ve got stars on top of your planet, that’s fine. Either erase them from the layer, or mask for nondestructive removal if you think you’ll move your planet later.
Finally, drop your rendered sphere as above, placing it onto the blender planet. It will look flat and awkward at first, so you’ll again adjust the layer, and again, overlay works really well. So does soft light.

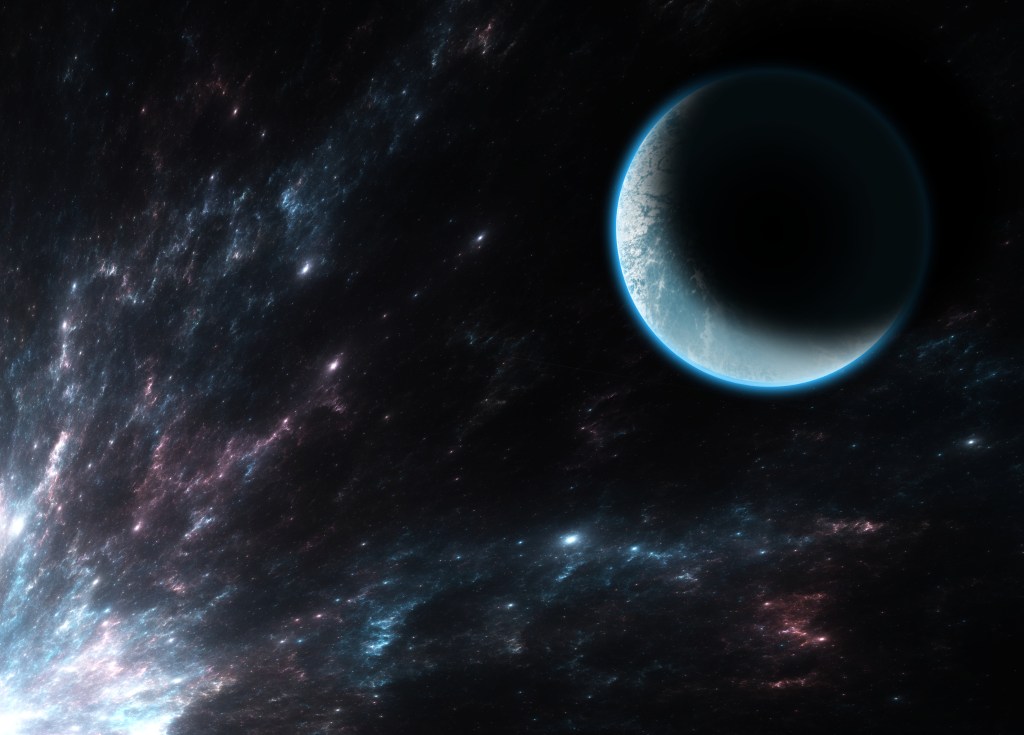
As you can see, I added some other elements to the scene. I am not going to fully describe how, in this post, which is going to get even longer in a minute… But it’s fun to see what moods you can get with the starfields, different settings, and using color palettes. I’d describe the airless moon above as being more ‘retro’ in it’s color and layout than the one I’ll show you next.
There a great video tutorial on creating planets here, and he uses a similar technique to what I did. Without using Blender to create the artfully shaded planet, but that’s ok, his trick for shadowing is great, too. Following his tutorial, and using another of my starfields, I got this scene, which is much more modern and realistic than the other scene. Not that either of these is wrong, but I wanted you to see the differences.

And that’s enough for today. I hope this inspires you to try creating your own universes in art!


8 responses to “Creator Mode: Art Tutorial”
So shiny…
(Makes Will Save, continues trying to get competent and efficient using Waveform. Which just released a new version, with more bells and whistles. And the IRIS 2 synth. And RX 8, even though 9 is already out!)
Oooooh… nice tutorial! Thanks Cedar!
You are welcome! Happy to answer any questions if you try it out.
[…] to usable in a few hours. I can do that while I’m doing other things. I’ve done a tutorial over at the Mad Genius Club if you want to give it a […]
Bookmarked.
Thank you.
Pretty space art isn’t my main focus, but it is nice to see how this works with these tools.
Thanks for this.
Very useful for anyone wanting to do a SF cover.
For what it’s worth the people who put out solar system scope have free planet textures at https://www.solarsystemscope.com/textures/.
And I’m pretty sure places like NASA have them too if you want to look.
Again, thanks very useful. And yeah Affinity rules. I use Publisher for hardcopy interiors.
Cheers,
Andy van Aardvark (supposedly)
You’re right! There are so many ways to make space art! And you outlined a very nice way, here!
Allow me to add to the scene! https://ship.shapewright.com
Allows you to create unique spaceships. You type in a name at the top and click “Build it” and it does. You can then download the ship as a .wrl file. There are online converters. Or you can import the file directly into Blender. Once there, you can add textures (if you know how to add nodes) or render it as is, as a 2d image to import and paint on the textures later in a 2d program. And then you have a unique asset to add to your scenes. You could also do 2-5 ships import them all and “mash” them together (kitbash). Lots of fun to see ships with your name on them! Both the website and Blender are totally free. If you have questions, just ask!