
Something snarky about dropping shadows on covers by Draven
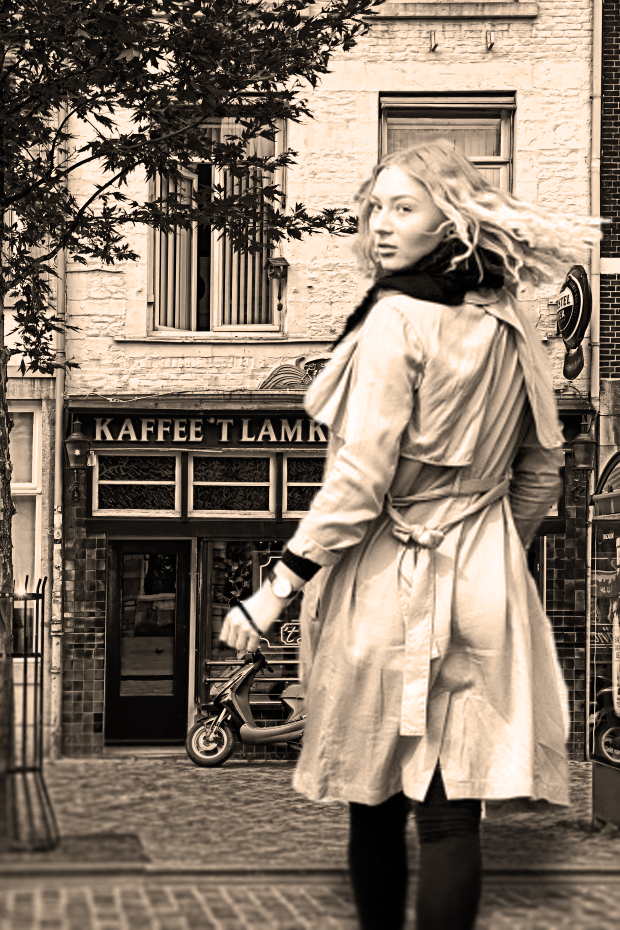
A few months ago Sarah posted a tutorial on making a cover from found images. After looking at her results, I mentioned that a drop shadow would improve the appearance of the cover and Sarah requested I write up a tutorial covering that.
(I no longer have the original images Draven is working from, but you can guess them from the post. For explanation, this post got lost between our emails FOR YEARS- SAH)
So, I went and sourced her original images. I’m not going to specifically cover things like removing the background- Sarah already did that- but I’ll certainly be mentioning how I did things differently or ways to improve the results.
Now me personally, I’m working in Photoshop 2020, because I have the entire Adobe Suite installed because, well, I am likely to use them. You can do the same kind of stuff in most other image processing programs, I even tested doing it in GIMP.
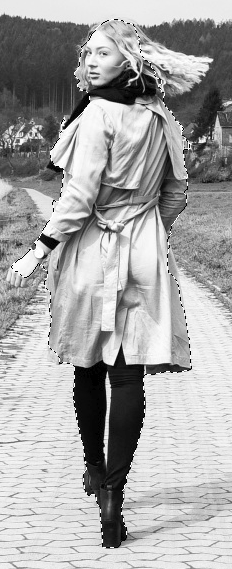
I used Photoshop’s Object Selection tool (the tool formerly known as smart selection, no idea why they renamed it) and got the results you see here. Its not a very precise selection but it’s a good start.
[Zoom in and refine]
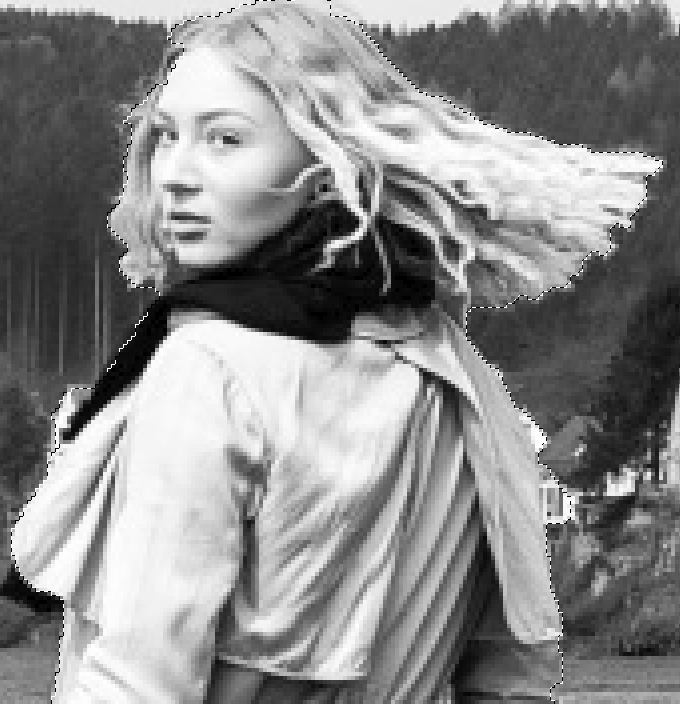
Like in Sarah’s tutorial, then I had to zoom in and refine the selection.
Once I had her selected without cutting anything off or selecting too much excess background, I copied the selection and them pasted it into the background as a new layer.
[new layer.png]
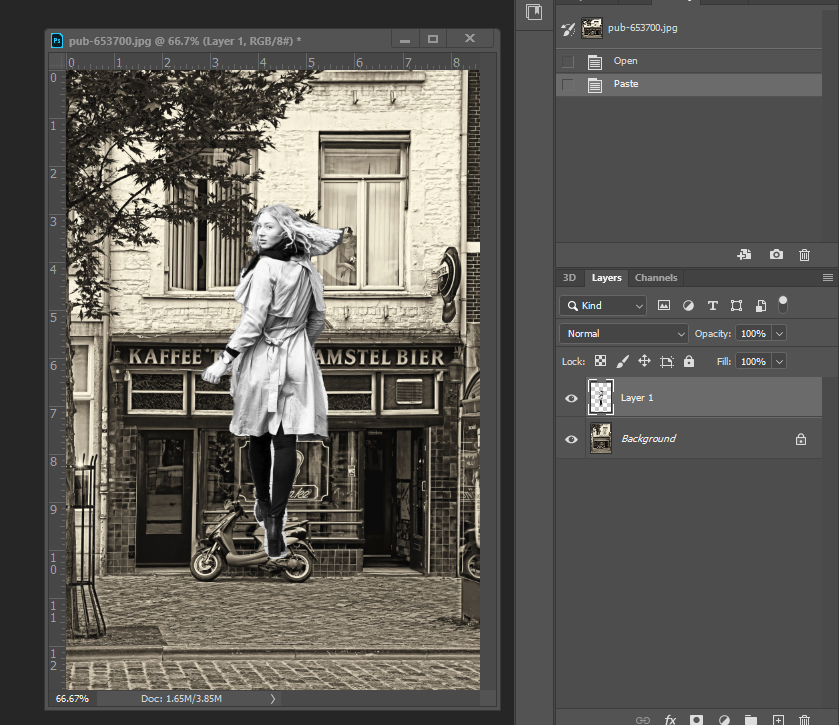
Of course, she’s out of scale with the background but we’ll take care of that in a moment after refining the edges on the foreground subject. For this, we’ll be using a few techniques: the lasso tool, the eraser tool set to block, and the eraser set to a softer shape. You clean up the edges before scaling because scaling it up first will create a lot of blurred interpolated edges that will make it even harder to clean.
As a note, when using the eraser tools work in small pieces instead of continuously erasing an entire border… that way if you make a small mistake, undo will only erase a stroke or two instead of several seconds of work. (These kinds of extended ‘hold the mouse button down for several seconds while doing … are why graphic artists these days buy either a: lots of cheap mice or b: gaming mice with long lasting switches.)
[dark border.png]
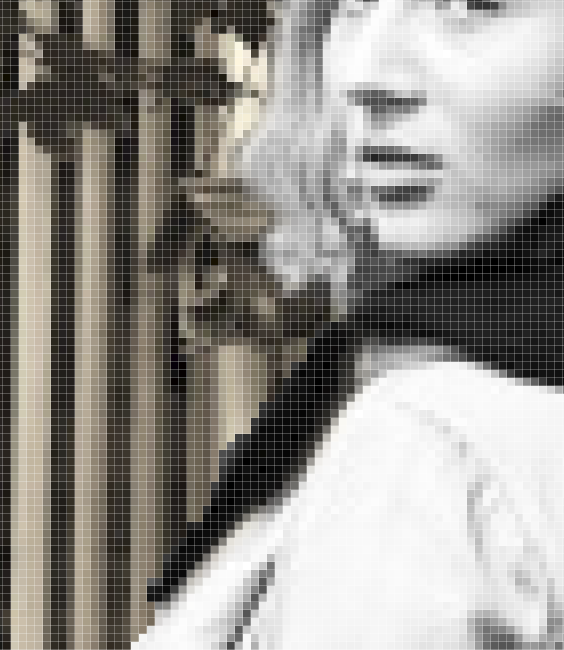
While working on the edges of this I notices where the background had been selected, a dark border had formed, or in some cases a light border. That’s no big deal, we’ll get rid of it.
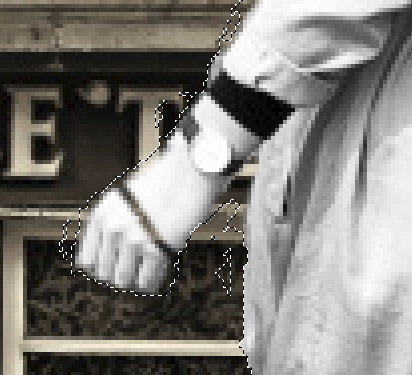
[bad edges.png]
Use the magic wand tool (or whatever your image editing app calls it to select the are around the girl (but not the girl.) coincidentally, doing this will also show you bad edges where you may not have completely erased something. If this happens, invert your election and erase over the bad areas. Deselect everything and use the magic wand tool again.
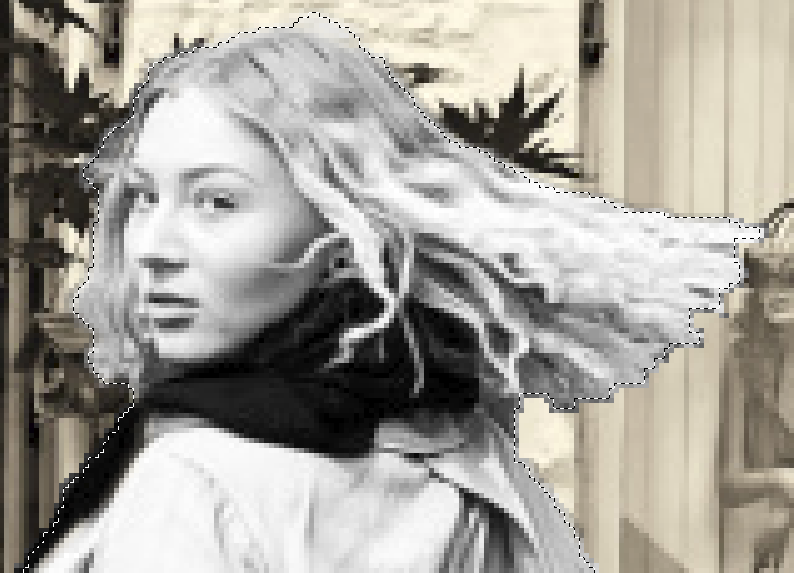
Now that you’ve got this area selected, expand the selection by two pixels and then feather the selection by one pixel and then feather it by a half pixel.
[voila.png]

Hit delete and voila the black border is gone, and the edge of the foreground is softened a little which actually helps it blend in when zoomed out.
[transform.png]
Now we can use the transform tool to change the foreground object to match what we want between it and the foreground.
(Okay, now that I have basically redone what Sarah did last time…)
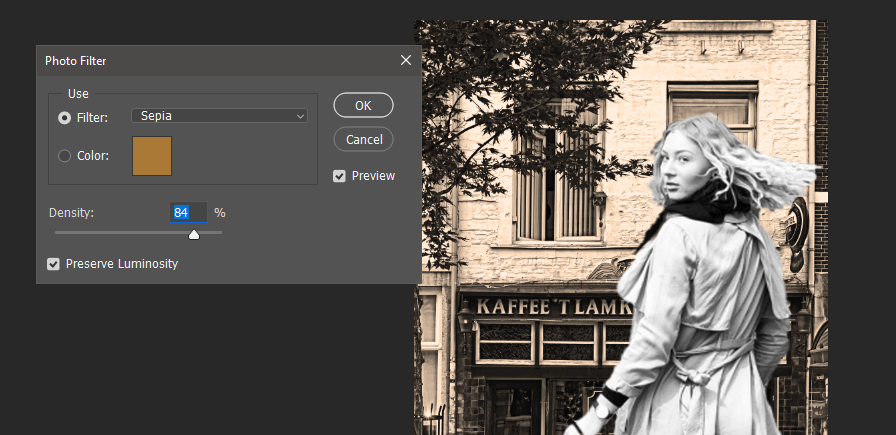
Now we need to match the colors between the foreground and background. Exactly matching the slight sepia tone of the background is not hard, but it is far easier to just remove the color from the background and then use color filters so they are filtered the same. Aldo, to make it math a little better, I pushed the contrast on the background so it better matches the contrast shown in the foreground.
Now what was I here for? Oh yeah, I was supposed to be doing a shadow…
Select the background around the girl again using the magic wand tool. Select Inverse, and you’ll have the girl selected.
Create a new layer, then place it under the foreground. Now fill that selection with black.
Next, use your transform tool (in Photoshop specifically, Distort) to distort this black figure to create a ‘shadow’ on the ground.
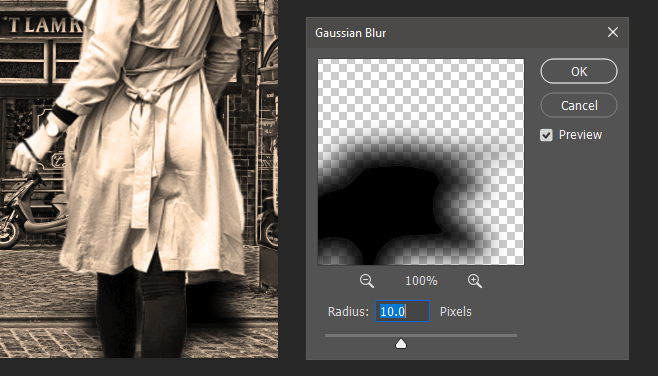
Now for the secret sauce, so to speak. Take that layer and Gaussian Blur it to the level of your desired shadow softness. I used ten pixels.
To finish off the shadow effect, set the later type for the shadow to ’Darken’. Adjust the opacity of the layer to suit.

And that gives you a reasonable representation of a shadow, and helps marry the foreground to the background.
[polished.png]
Other things you can do: Specifically in Photoshop, I applied a Lens Blur before the gaussian Blur, with the focal point set at the feet… this made the shadow get more diffuse the further you got from the feet. I then applies in Iris Blur from the Blur Gallery, focal point on her face with a radius of larger than the image height… gives it a subtle lens effect that helps with the whole thing.
Anyway that about wraps this one up, I’ll be around to help below.
(Note that I don’t use either photoshop or Gimp. I’m not allowed to put adobe products on my computer. Well, I am, but I don’t want to have to get a divorce at my age. And GIMP makes me tear out ALL my hair. Photoshop lacks some of the tools. I’ve learned to use some sort of, but most of my covers these days are less “realistic.” However, Draven very muchly has a good tutorial, and you guys should heed it. So sorry it took years to get to me. – SAH)


10 responses to “Something snarky about dropping shadows on covers by Draven”
*bookmarks and also scribbles rapid notes*
Thumbs up, very helpful.
On mouse switches, if you are vaguely competent with a soldering iron, most mice seem to use sub-minature micro-switches, that can be replaced with much longer lasting ones in about an afternoon.
You can get 4 packs of Omron D2F-1F micro switches from Amazon for about $8. I replaced the switches in my Logitech G603 with those and it’s been rock solid ever since, despite it being, literally, the first thing I’ve ever soldered in my life.
You will want soldering helping hands though. The PCB gets quite hot…
If you want to do this, I highly recommend ordering from an authorized distributor such as Digikey, so you know you’re getting the real thing, not a Chinese clone or used one. Cost isn’t much more ($1.89 each at DK, plus shipping)
https://www.digikey.com/en/products/detail/omron-electronics-inc-emc-div/D2F-01F/83266
Ah very cool. That’s a good point about counterfeit parts on Amazon. It hadn’t occured to me we could do small batch parts orders from digikey.
Definitely going to keep that in mind for future electronics orders.
Also, for the artists wondering if they can solder, it’s about having a steady hand, and being able to stick stuff where you want it before it dries. If you can paint you can probably solder better than I can.
It’s like doing little detail painting, just with molten metal and rods hot enough to burn the canvas.
yes, but it also becomes a ‘how much is your time worth’ prospect…
Thanks. On Lousy Book Covers, I’ve noticed that one of the biggest things that makes it obvious that something has been cut-and-pasted into a scene is the lack of a shadow. Knowing a technique to add one, even if I think I’ll need lots of practice to do it, could be very useful.
also, don’t be afraid to go really subtle with it.
If you don’t like Gimp, Krita is also quite functional. More oriented towards painting / generating artwork, but it does stuff like magic wand, selections, layers, etc just fine. And for me, it just felt more workable than Gimp.
Probably they got too many curses rained on their head for its stupidity.